mLab
mLab is a fully managed cloud database service featuring automated provisioning and scaling of MongoDB databases, backup and recovery, 24/7 monitoring and alerting, web-based management tools, and expert support. mLab's Database-as-a-Service platform powers hundreds of thousands of databases across AWS, Azure, and Google and allows developers to focus their attention on product development instead of operations.
Using mLab allows you to deploy your app and manage the database. It removes the need for a local database to save data to to allowing your app to connect to the database held in the cloud.
To use mlab navigate to
Then sign-up
First you need to create a new database. Once your signed in you will be see the following page - click button create new in the MongoDB Deployments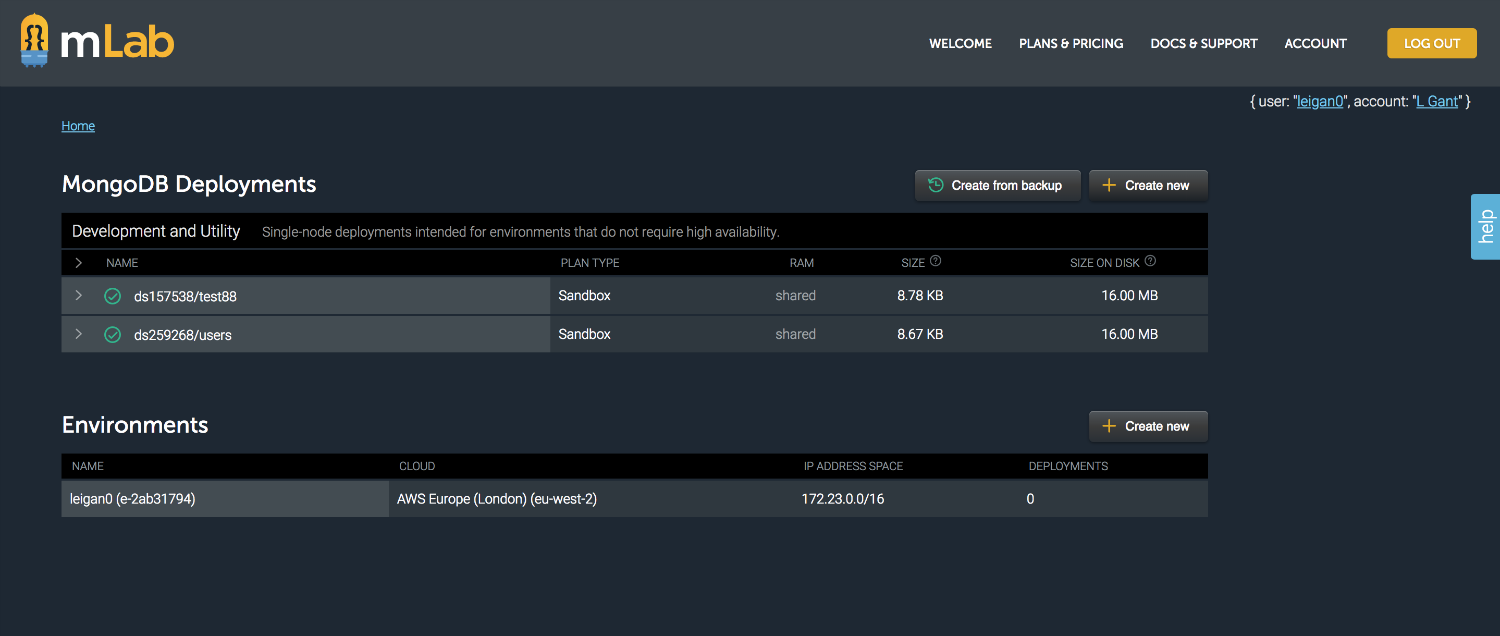 You then need to select a cloud provider and type of database you require. As our app is only in development stage I have selected sandbox as this will provide sufficient storage and functionality at this stage. Then select continue.
  mLab then asks you to select your region, complete this and select continue.
You then need to add a name for your database, I have selected dindr based on our app. 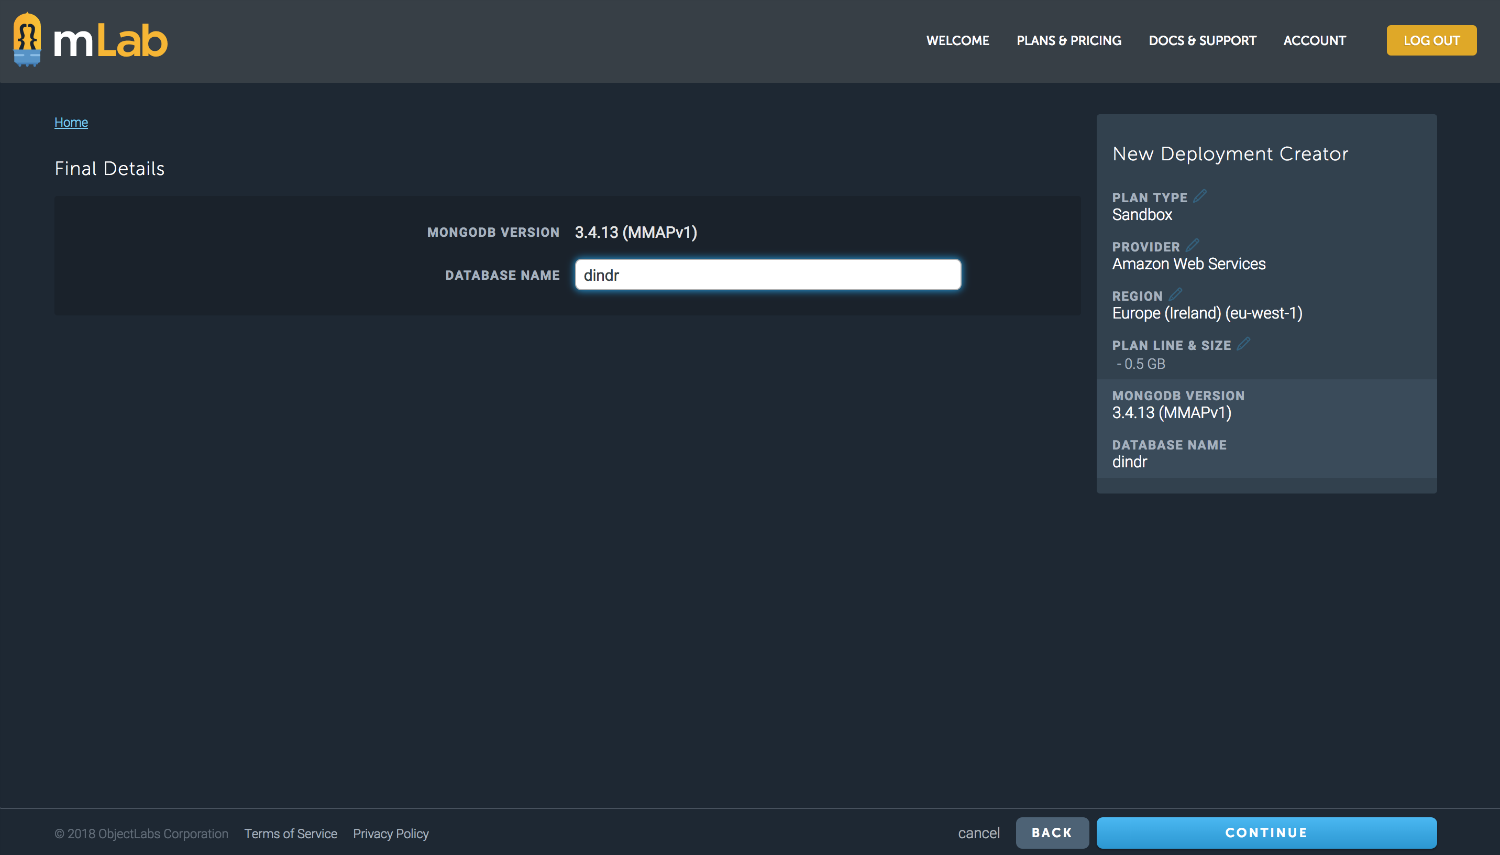 After this, confirm your choices and proceed.
Your database will then be added to your MongoDB deployments  To be able to read/write to the database you will need to yourself, and any other authorised users. To do this select your database.
 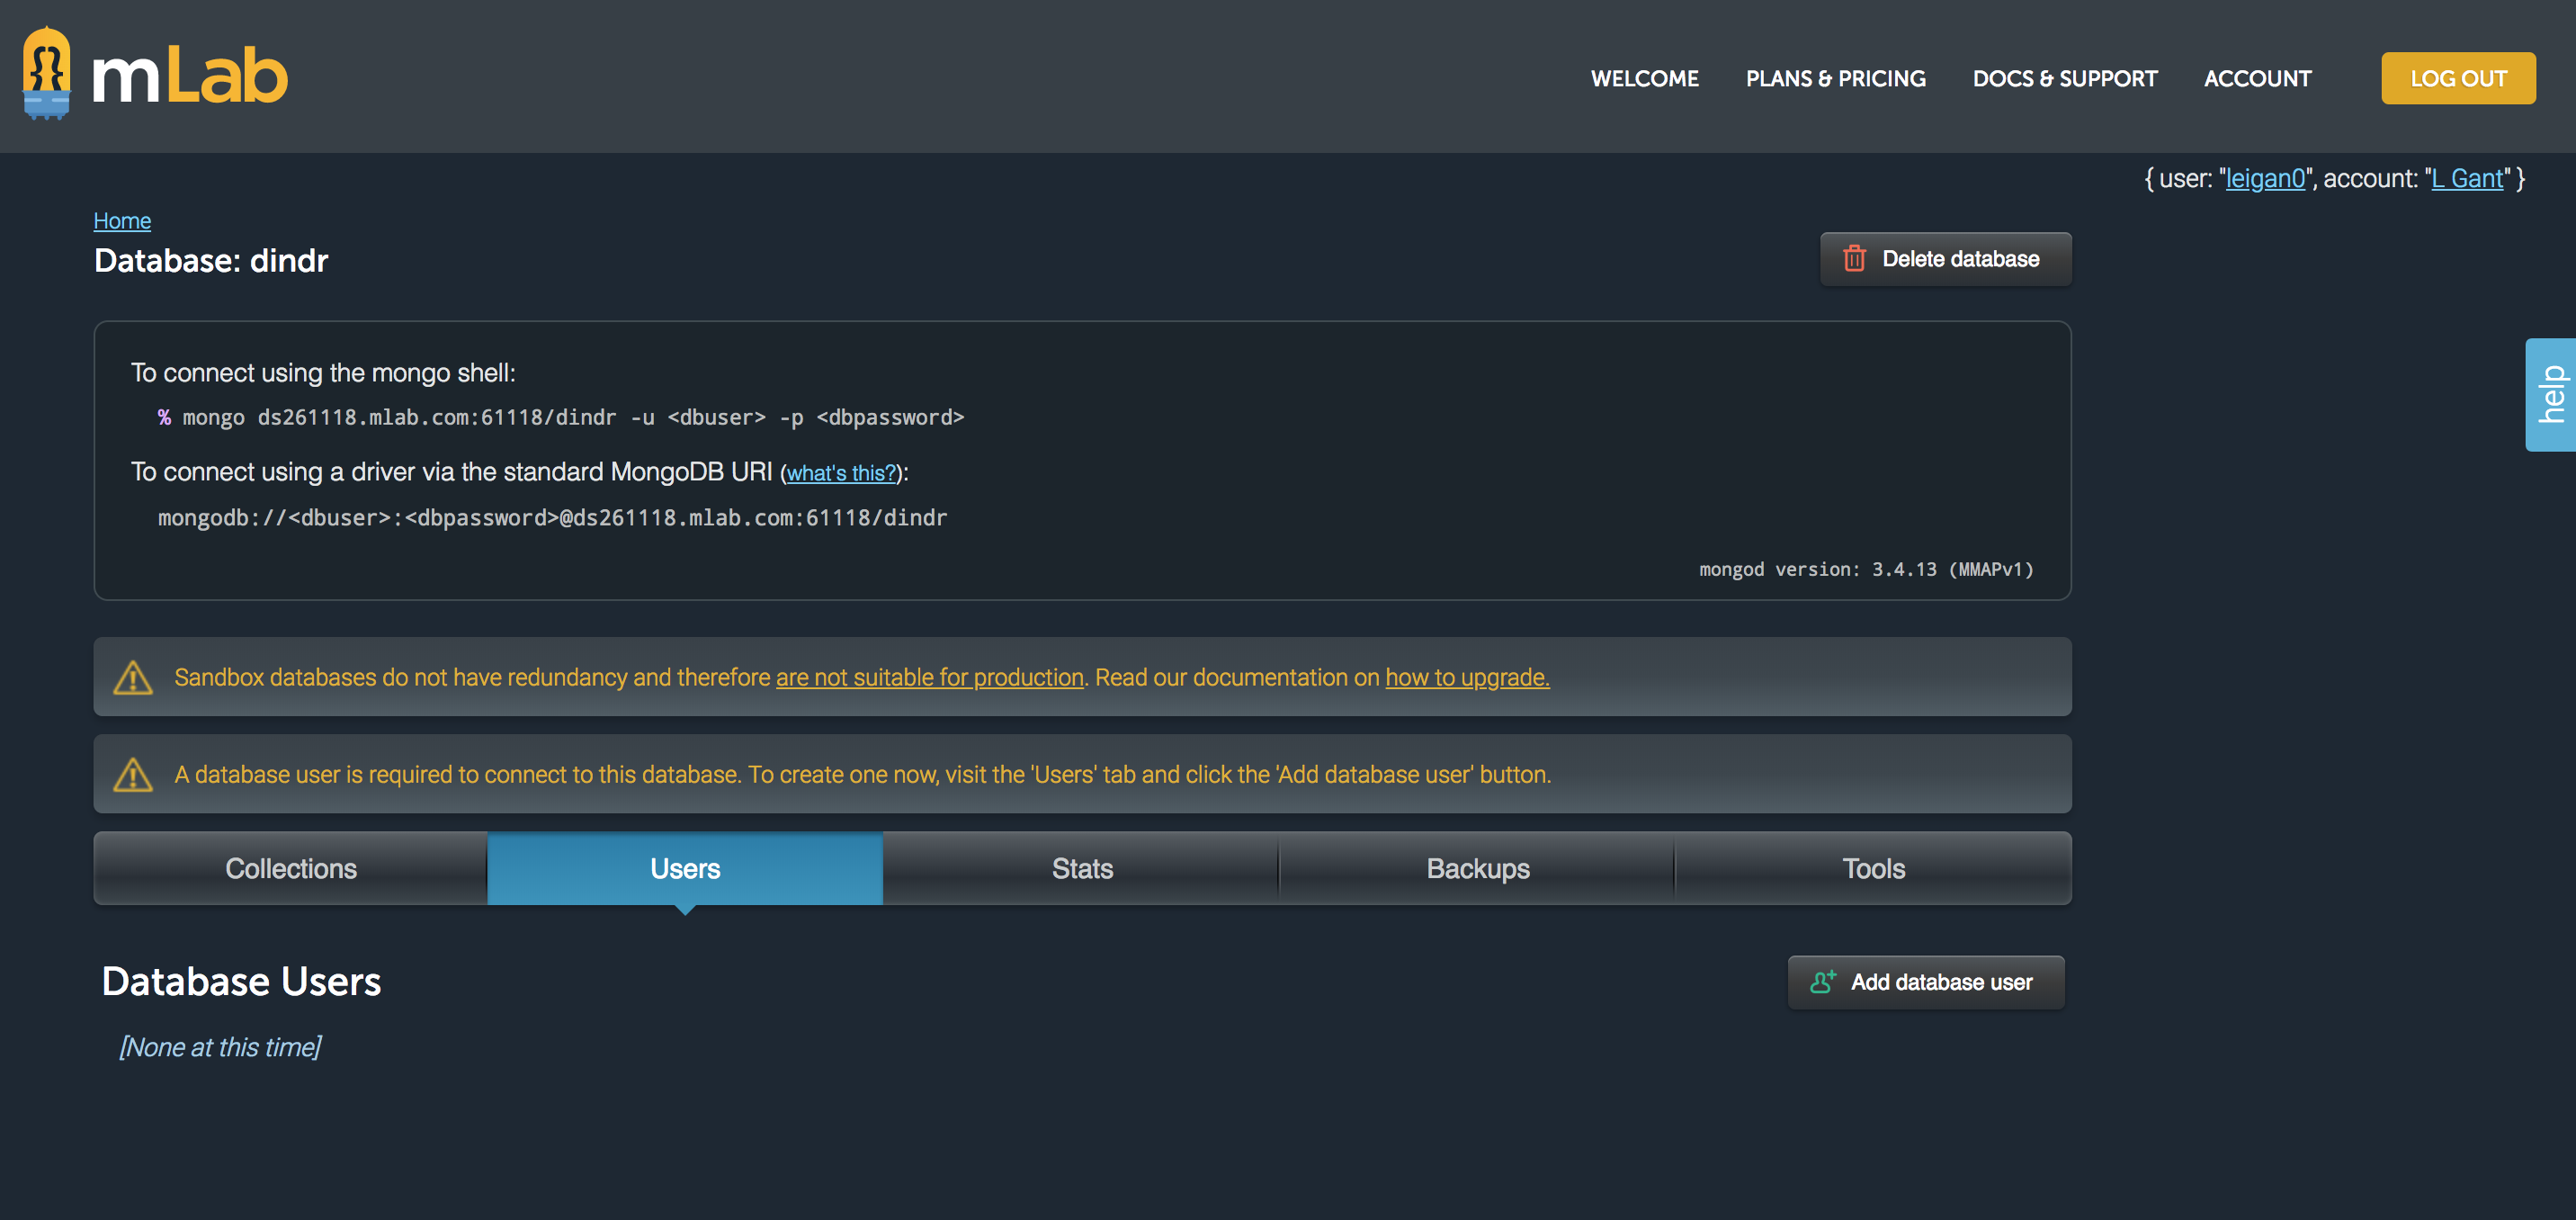 Add the required users:
Users added will now have read/write access to the database.
This tutorial assumes that you completed the express set up.
To connect to the database install Mongoose.
npm install mongoose
Within your server setup file add the following:
var mongoose = require('mongoose');
var url = 'mongodb://<dbuser>:<dbpassword>@ds261118.mlab.com:61118/dindr'
mLab will provide the url when you click into the database.
You need to replace <dbuser> with your username, and <dbpassword> with your own password.
It is not secure to add your username and password to your code, so to get round this a solution would be to save this information within env variables, so private information is not available.
To set this information as env variable enter the following into the command line - ' remember to change relevant to your own details'
export MONGOLAB_URI=mongodb://<dbuser>:<dbpassword>@ds261118.mlab.com:61118/dindr
The in your server setup file amend as per below:
var url = mongodb://<dbuser>:<dbpassword>@ds261118.mlab.com:61118/dindr
// to
var url = process.env.MONGOLAB_URI
To connect to the database here is some example code
// Mongoose Connect // connect to mlab

mongoose.connect(url, function (err, db){
  if (err) {
    console.log('Unable to connect to the mongoDB server. Error:', err );
  } else {
    console.log('Connect established to', url)
  }
});
This will produce visual output to confirm if the connection has been established.
You should now be connected to your cloud database.
To add fields to your database, you can create a model, usually in a models folder at the route of your project.
Here is an example model
var mongoose = require('mongoose');
var Schema = mongoose.Schema;

var userSchema = new Schema({
  userName : String,
  userEmail : String
})

var User = mongoose.model('User', userSchema);

module.exports = User
To add information to the database, in my example through a post request
/ Post new user //

app.post('/api/users', function(req, res){
  User.create({
    userName: req.body.NameOfUser,
    userEmail: req.body.UserEmail,
  }).then(user => {
    res.json(user)
  });
});
This req.body is a method that takes the body of the http request, and then can parse this information to get the information from Key Value pairs added within the post, in this example NameOfUser and UserEmail, it uses the value of these keys, and adds them to fields specified within the model.
To be able to use req.body method you also need to add the following:
const bodyParser = require('body-parser');
app.use(bodyParser.urlencoded({ extended: true })); // for parsing application/x-www-form-urlencoded